Return to flip book view
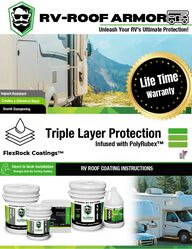
RV-ROOF ARMORLife TimeWarrantyDirect to Deck Installation Stronger that the Factory Coating RV ROOF COATING INSTRUCTIONSTriple Layer ProtectionFlexRock Coatings™ Unleash Your RV's Ultimate Protection!Infused with PolyRubex™ Impact ResistantCreates a Chemical BondSound Dampening
1Triple Layer ProtectionInfused with PolyRubex™ Direct to Deck Installation Stronger that the Factory Coating Get a roof coating that is moredurable than a Standard FactorySeamless and WaterproofBuy Online at FlexRockCoatings.com3X StrongerAdhesionZero VOC'sEasy ApplicationWater ProofIntroducing the "RV Roof Armor" system by FlexRock, a revolutionarysolution that combines the exceptional qualities of FlexRock, FX-100, andPolyRubex, enhanced by the addition of the FX Silicon topcoat. Thiscomprehensive system delivers unparalleled protection, durability, andperformance for RV roofs. With the strength and resilience of FlexRock, theversatility of FX-100, the advanced properties of PolyRubex Binder, and theadded benefits of the FX Silicon topcoat the RV-Roof Armor system ensuressuperior defense against the elements, making it the ultimate choice forlong-lasting RV roof protection.
Exceptional Durability: FlexRock Roof Armor is designed to withstand the toughestconditions, providing long-lasting protection for your roof.Seamless Waterproofing: With its advanced formulation, FlexRock Roof Armor creates aseamless barrier that effectively prevents leaks and water damage.Impact Resistance: The rugged composition of FlexRock RV Roof Armor makes it highlyresistant to impacts, protecting your roof from hail, falling debris, and other potential hazards.Energy-Efficient: FlexRock Roof Armor helps in reducing energy consumption by reflecting sunlight andheat, keeping the interior of your RV cooler and reducing the strain on your cooling system.Easy Application: FlexRock Roof Armor isuser-friendly and can be easily applied tovarious roof surfaces, ensuring a hassle-freeinstallation process for RV owners.STRONG BY NATUREZero VOCsECO FRIENDLYECO FRIENDLYRV-ROOF ARMORWaterproofEasy Paint On UV ResistantLife TimeWarrantyFlexRockCoatings.com | 800.808.0414 | info@flexrockcoatings.comOur factory-direct program is straightforward and designed to save you money Unleash Your RV's Ultimate Protection!
Life TimeWarrantyRemoving The Old MembranDirectly To Wood DeckingOur “Direct To Deck Kit” gives you everything you need to apply a three layersof the entire FlexRock RV Coating system directly to wood decking.Direct to Deck Kits come with enough FlexRock Coatings for all threelayers of to seal your seams and penetrations, enough Flex SealTape to seal your wood seams and edges, and enough Flex SealantTape to apply Flex directly to a wood surface.Our Direct to Deck System is the perfect solution for those who haveexisting damage to their roof. You can also use our system as ahybrid, going over a partly normal roof and a partly repaired roof withwood decking. This will allow you to blend the roof for one finalseamless look across the entire application.Direct To Deck KitBefore removing the existing rubber membrane roof from your RV,check the weather forecast to ensure no rain is expected during theprocess. If rain is possible, have a tarp ready to cover the exposedplywood immediately after removal to prevent it from getting wet.Take your time to carefully detach all materials from the wooden deck,remove fixtures, and peel off the membrane. After cleanup anddisposal of the old material, apply FX 100 to the dry plywood for thenew roof. Following these steps ensures a secure and reliable roof foryour RV.*Do not apply FX-100 over a previously silicone coated roofRV-ROOF ARMORUnleash Your RV's Ultimate Protection!
WaterproofEasy Paint OnRV-Roof Armor UV ResistantSound Dampening Unleash Your RV's Ultimate Protection!Impact ResistantTriple Layer ProjectionLayerPolyRubexBinderPolyRubex BinderRV-ROOF ARMORTriple Layer ProtectionFLEXROCK FX-100Poly rubexFX-SILICONE HIGH SOLIDFX-MASTIC SILICONEDirect to Deck ApplicationInfused with PolyRubex™ Unleash Your RV's Ultimate Protection!What are the layers and what is their purpose?Impact ResistantCreates a Chemical BondSound DampeningFlexRock RV Roof Armor is highly resistant to impacts and can be applied inmultiple layers, thanks to the Polyrubex acting as an Impact Resistancebinder. This unique component allows for a thicker and more robustapplication than any other RV coating available, making it the perfectsolution for those seeking increased durability and sound dampeningFlexible Base Coating is super versatile it can be applied extra thick for addedprotection. By applying more material, you simply add more protection. Thisthicker system is perfect for filling cracks and imperfections. A chemical bond isformed between FlexRock and the surface, creating a waterproof casement.High Solids Silicone is a single-component, moisture-cure, fluid-appliedroof coating. It can be applied in a single pass and cures to create aseamless film on most roofing substrates. Its water-resistant capabilitiesallow it to withstand ponding water on surfaces with a slope equal to orless than 1/12FX-Silicone Flashing Mastic/Flashing is a moisture-curing sealant thatadheres well to various surfaces. Typically used to seal existing penetrations,this product ensures thorough sealing wherever sealant was previouslyapplied. Additionally, FX-Silicone Flashing Mastic can serve as a standalonerepair solution for patching leaks.
Easy Apply Roll OnFluid Applied Reinforced RV Roof SystemsUV ResistantOdorless Zero VOC. Repair Almost Any Commercial Flat Roof. Ponding water has no effect on FlexRock Coatings. Self-leveling, super-adhesive, waterproof,sustainable, and fast-curing.Provides waterproof protection.Stands up to permanent ponding water withoutbubbling, peeling, or breaking down.Stays flexible and maintains adhesion.FlexRockCoatings.com | 800.808.0414 | info@FlexRockCoatings.com ADHESION TESTINGSTRONGER THAN CONCRETEFlexible Rock Coating is super versatile it canbe applied extra thick for added protection. Byapplying more material, you simply add moreprotection. This thicker system is perfect forfilling cracks and imperfections. A chemicalbond is formed between FlexRock and thesurface, creating a waterproof casement.FlexRock Coating is a natural fluid membranewith an industrial strength adhesive.FlexRock Coating is made mainly from plant-based oils, minerals, an natural fibers. It isvirtually odorless and contains no volatileorganic compounds (VOC).Once mixed, it spreads on easily like other fluidsealants and then bonds at the molecular levelwith almost any material — brick, metal,asphalt, concrete, metal, wood, etc. —Eclometer adhesion testing has proved itsadhesive power to be stronger than epoxy orconcrete.FLEXROCK FX-100*Do not apply FX-100 over apreviously silicone coated roof
1. The owner/installer must prepare the roof by addressing all of the conditions outlinedin this document. Examine the roof to receive FlexRock Coating System. Please do notproceed with the FlexRock Coating installation until unsatisfactory conditions have beencorrected appropriately.2. Make sure the roof is free of delamination and defects (holes & other openings, tears,cuts, and open or partially opened seams).If the defects are larger than 1/8”, repair before coating application.3. Clean, dry and clear surfaces must be used to apply coatings or repair, free from dust,grease, wax, or other incompatible substances to facilitate appropriate adhesion. Ifgrease, oils or heavy contaminants are present on the roof surface, remove them with amild detergent prior to final cleaning. The use of bleach mixed with water can be used toremove algae, fungi, or vegetation. Thoroughly rinse surface and allow to dry prior tocoating.4. Roof decks that are deteriorated or structurally unsound should be replaced.G E T C O A T E DRoof Surface PreparationA thoroughly prepared roof iscritical for a long lastingapplication. Fluid Applied Reinforced Roof SystemsSTRONG BY NATURE • HIGH PERFORMANCE RV ROOF COATING SYSTEM
PIN HOLES AND RIPS IN FACTORY ROOFSLOOK FOR BROKEN VENTSThe initial phase involves a thorough inspection of your roof. Regardless of the type of roofingsystem being installed, a sturdy foundation is essential to ensure longevity. This principle alsoholds true for the FlexRock Coatings roofing system.Tips for a Successful Installation of theFlexRock Coatings Roofing SystemTo ensure that the installation of theFlexRock Coatings Roofing System goessmoothly, it's essential to conduct athorough roof inspection beforehand.Check for leaks, soft spots, rotted wood,broken vents, and any other problematicareas. It's important to fix any issuesbefore installation to maximize theeffectiveness of the roofing system. Ifrepairs are necessary, refer to the"Special Situations, Wood Replacement,and FlexRock Seam Tape" section in theinstallation instructions for guidance.Roof InspectionExamine all penetrations and pinpointany areas that need to be repaired.Helpful Tip: When working on your roof, you will bemoving up and down frequently. It's advisable not todepend solely on an RV or any attached ladder. For betterstability, opt for an extension ladder and attach a foamnoodle or a towel on each side for climbing up and downthe roof. This method offers enhanced stability whilecarrying materials and moving yourself up and down. Thefoam noodle also serves to protect the surface againstwhich the ladder leans.Use a ladder for convenience and safety
LEAF BLOWERPOWER WASHOnce you've cleaned the roof, spray water on thesides of your surface to avoid streaks caused bydirt and cleaner. This is crucial, especially underdirect sunlight. Depending on the situation, youmay need to wet the sides regularly during thecleaning procedure.Cleaning the RoofIf your roof is covered with dirt, sediment, leaves, treebranches, etc., use a leaf blower to clear away as manydry particles as possible before starting the washingprocess.Start by pressure washing the roof andsealants, and remember to take your time!It's crucial to remove dirt and grime toprovide a suitable surface for productadhesion. Thoroughly pressure wash allareas to eliminate dirt, grime, and mold fromevery possible spot.Medium Stiff brush
DEEP CLEANINGCLEAN AREA THOROUGHLYSCRUB ROOF &SEALANTSRINSE WITH WATERAS YOU GODRY THOROUGHLYTo clean your roof effectively, follow these steps:Wet the entire roof area.Scrub the roof and sealants using the Simple Green mixture and a medium to stiff bristle brush on anextension pole, using a back and forth overlapping motion.Work in small sections, rinsing with clean water from a hose or pressure washer as you progress.Rinse the sides of your application as you move to prevent dirt and cleaner from accumulating on thesides as it flows off the roof.Keep in mind that Simple Green can remove dirt and oils but not stains. If discoloration persists after 30seconds of scrubbing, move on as it may be a stain.Once the roof is scrubbed and rinsed, ensure it is completely dry before proceeding. Use a leaf blowerand towels to remove any trapped water around vents and under A/C units to aid in the drying process.Scrub the roofOnce the roof has been pressure washed to eliminate dirt and grime, proceed to scrub it withSimple Green to eliminate any remaining grease or oils.Simple Green is a highly potent concentrated cleaning solution designed to eliminate surfacecontaminants like oils, dirt, and oxidation. It is environmentally friendly, non-toxic, and doesnot leave behind any harmful by-products or pollutants.Heavy duty cleaning: Use 4–6 oz. of Simple Green 3 per gallon of water to clean heavily soiled areasPressure washing: Mix half and half of outdoor bleach and Simple Green, and then blend at about 50% with justregular water Clean Area Thoroughly
CLEAN AREA THOROUGHLYSCRUB ROOF &SEALANTSCLEAN WITH PAINTTHIN IF NEEDEDDRY THOROUGHLYClean Sealants and TrimsMake sure that all sealants are clean and in good condition.Here's a handy tip: If you'redealing with stubborn dirtand grime that won't budgewith regular cleaner, using asmall amount of paintthinner on a cloth can workwonders in cleaning thosetough spots.After cleaning and washing the roof, the next step is to complete the cleaning of allsealants. The FlexRock Coating Roofing System can be applied over existing sealants,ensuring they are in good condition and thoroughly cleaned.Examine the current sealants for integrity and cleanliness, especially around skylightflanges, vents, antenna bases, ladder bases, termination bars, etc.Prior to applying any FlexRock Coatings, ensure that factory sealants are cleanedthoroughly on all flanges.AFTERCLEANINGPRO TIP
PREPARATION WITH MASKING TAPEAfter cleaning the roof and removing all sealants, the next step in preparing theroof is to tape off areas where you do not want FlexRock Coatings to adhere.Utilize common blue painter’s tape to mark off fixtures and edges like skylights,railings, and end caps. Remember to remove the tape while the membrane is still wet to prevent edgepulling; apply tape in 4-6-foot sections or smaller for easier removal during theapplication of FlexRock Coatings. Place a clean line of tape on the front and back caps extending beyond any roofpenetrations, and a few inches past termination bars for a polished appearance. After cleaning the roof and securing the taped areas, proceed with installing theFlexRock Coatings System!SkylightsEdgesVentsAntennaAC UnitsSolar PanelsEnd CapsTap GuttersMasking TapeMARK OFF ANDPROTECTREMOVE WHEN STILL WETREMOVE OR TAPE OFFVENT COVERSApply masking tape to the areaswhere you do not want FlexRock toadhere.
REMOVE OLD CAULIINGWARM WITH HEAT GUNRemove Old Sealants and TrimsRemove old sealants by using a prying motion anda scraper blade.If it's chilly outside, try using a heat gunto warm up the sealant, making it easierto remove.Use caution with heat gun, Do not set a hot heatgun on the roofPRO TIPIf your sealants seem worse for wear, giving them a quick scrub maynot cut it. If they're showing serious cracks, refusing to stick, orplaying host to all sorts of grime, it's time to bid them farewell for afresh start.Don't forget to keep a handy trash can close by for a swift sealantdisposal. This nifty trick stops them from sneakily reattaching to theroof after their removal.
PRO TIPPreparation for ApplicationUSE DRILL TO REMOVE VENT COVERS, SATELLITE DISHES, BRACKETS, ETC.Keep a bucket nearby to store hardware so that you have it onhand when you are ready to reassemble the fixtures at the end.PLACE HARDWARE IN CANFOR SAFEKEEPINGFor the best application of the FlexRock Coatings on your RV.Consider removing vent covers, antennas, and brackets. This allows for easy access to flanges and mounts. Alternatively,cover them with tape and protection to prevent coating from gettingon them. Start by removing any obstructions like vent covers orbrackets, and elevate antennas if needed for roof cleaning. Thisensures a smooth and effective coating application process.
How to Apply FX-Silicone Flashing Mastic:Step 1: Prepare your workspace. Ensure the front and rear captermination bars are clean and dry before starting the applicationprocess.Step 2: Dip a 3” brush into the FX-Silicone Flashing Mastic container.Load the brush generously with the product.Step 3: Straddle the termination bar with your brush, positioning itapproximately 3” on each side. Apply liberal amounts of FX-SiliconeFlashing Mastic along the termination bar, ensuring coverage over thebar and onto the roof and cap.Step 4: Smooth out the FX-Silicone Flashing Mastic using the brush.Aim for a uniform and even application, ensuring complete sealingaround the termination bar.Step 5: Continue applying FX-Silicone Flashing Mastic in sizableamounts, using the brush to smooth it out as you go. Be thorough incovering the area.Step 6: As you progress, periodically return to previously appliedsections. While the FX-Silicone Flashing Mastic is still wet, apply alayer of FlexRock base coat on top. This helps to smooth out the FX-Silicone Flashing Mastic and promotes adhesion for a polished finalappearance.Step 7: If you've extended the application all the way to the tapeplaced beyond the termination bar during preparation, remove the tapewhile the product is still wet. This ensures clean termination lines.By following these step-by-step instructions, you'll effectively applyFX-Silicone Flashing Mastic to seal the front and rear cap terminationbars, ensuring a secure and professional finish.Applying FX-Silicone Flashing MasticTERMINATION BARS Termination bars, also called aluminum strips, are used tosecure the edges of an RV's roof membrane to the camperwith screws. They are an important part of keeping an RVfree from water damage.TERMINATION BARS APPLY HEAVY COATREMOVE TAPE WHILE WETSilicone Mastic Flashing
Effective application of FX-Silicone Flashing Mastic is crucial for the success of your installation project. FX-SiliconeFlashing Mastic is specifically formulated to be applied over termination strips on both front and back caps, aroundskylight flanges, vents, antenna bases, and the base of ladders, among other areas. Essentially, any surfaceoriginally sealed with sealant requires FX-Silicone Flashing Mastic application.This component of the FlexRock Coatings System is notably thick, engineered to provide enduring sealing againstwater intrusion, dirt, and debris, which could otherwise compromise your roof's integrity. By systematically sealingthese vulnerable areas with FX-Silicone Flashing Mastic and applying the FX-Silicone Flashing Mastic base layer,you fortify and safeguard regions that are susceptible to penetration by screws and bolts.Here's a step-by-step guide to properly apply FX-Silicone Flashing Mastic:1. **Prepare Your Materials:** - Gather a container of FX-Silicone Flashing Mastic. - Pour a small amount of FX-Silicone Flashing Mastic base layer into a separate container for easier application. - Ensure you have two brushes ready for use.2. **Identify Application Areas:** - Determine the areas on your roof where FX-Silicone Flashing Mastic needs to be applied. - Focus on termination strips, skylight flanges, vents, antenna bases, and ladder bases, as well as any othersurfaces previously sealed with sealant.3. **Open the Container of FX-Silicone Flashing Mastic:** - Carefully open the container of FX-Silicone Flashing Mastic, ensuring not to spill or waste any of the material.4. **Prepare the FX-Silicone Flashing Mastic Base Layer:** - Pour a small amount of FX-Silicone Flashing Mastic base layer into a separate container. This will make it easierto work with as you apply it.Applying FX-Silicone Flashing MasticPAINT ALL TERMINATIONBARS WITH FX- MASTICPRO TIPAlways have a backup Poles, Rollers and BrushesBe well prepared with extra toolsOver existing membrane
PRO TIPProtect with TapeFlexRockCoatings.com | 800.808.0414 | info@flexrockcoatings.comPainting Detail Areas FirstCAVent PenetrationsSkylight Fluid Applied Reinforced Roof SystemsMasking TapeThe end goal is to have all areas trimmed-in, so that the final membrane can be rolledout onto the main portion of the roof.At this stage, ensure that all sides and penetrations are sealed using Caulking, FlexRockMastic, and topped with a layer of FlexRock Silicone. To start, pour a portion of theFlexRock Silicone into a small container. Have this container and a brush ready for the nextsteps.After sealing the penetrations, proceed to complete the detailed application of FlexRockSilicone in areas that are hard to reach with a roller. Utilize a 3” brush to apply the FlexRockSilicone Basecoat Layer beneath A/C units and up to foam seals. Cover all fixtures on the roofthat haven't been treated with a layer of the FlexRock Silicone Basecoat Layer. Make sure toapply a layer of FlexRock Silicone Basecoat Layer on the sides, over screw cover strips, anddown to the gutter system.CUT IN AROUND FIXTURESCUT IN ENTIRE ROOF TO PREPARE FLEXROCK SILICONE Over existing membrane
5. **Begin Application:** - Use one of the brushes to apply FX-Silicone Flashing Mastic over the designated areas onyour roof. - Ensure thorough coverage, especially in areas prone to water intrusion and debrisaccumulation.6. **Apply the FX-Silicone Flashing Mastic Base Layer:** - Use the second brush to apply the FX-Silicone Flashing Mastic base layer over the areascoated with FX-Silicone Flashing Mastic. - This base layer enhances the sealing effectiveness and durability of the mastic.7. **Ensure Complete Coverage:** - Double-check that all vulnerable areas, including those penetrated by screws and bolts,are adequately sealed with FX-Silicone Flashing Mastic and the base layer.8. **Clean Up:** - Once you've finished applying both layers, clean your brushes and seal the containerstightly to prevent the mastic from drying out.By following these steps meticulously, you'll effectively seal critical areas of your roof,mitigating the risk of water intrusion and maintaining the integrity of your installation project.Applying FX-Silicone Flashing MasticFX-Silicone Flashing Mastic is a moisture-curing sealant that adheres well tovarious surfaces. Typically used to seal existing penetrations, this product ensuresthorough sealing wherever sealant was previously applied. Additionally, FX-SiliconeFlashing Mastic can serve as a standalone repair solution for patching leaks.
PRO TIPProtect with TapeCover the areas that you want to add extraprotection to first. then coat the larger flatareas.AC and Vents SkylightsFlexRockCoatings.com | 800.808.0414 | info@flexrockcoatings.comBrush on problem areas and create aseamless incasement. Painting Detail Areas FirstCAVent PenetrationsSkylight Fluid Applied Reinforced Roof SystemsMasking TapeThe end goal is to have all areas trimmed-in, sothat the final membrane can be rolled out ontothe main portion of the roof.
Moisture in the product causes it to produce CO2 gas which may causepressure build-up inside a sealed container.FlexRockCoatings.com | 800.808.0414 | info@flexrockcoatings.comFLEXROCK FX-100FLEXROCK FX-100STORAGE AND MIXING Natural Minerals and Plant-base Oils in the Part Amix will separate over time.Safety glasses, gloves, and protective clothing must be worn at all times.Part A:1. It’s recommended that Part A be stored at room temperature. Noless than 32°F (0°C).2. The Part A bucket should be stored upside down for ease of mixingwhen used. Flip over several (minimum one day) days before use.Part B:1. It’s recommended that Part B be stored at temperatures between 75° to 105°F(24° to 41°C).2. Product must be kept free of moisture. Keep container closed because the product absorbs moisturefrom the air over time.FLEXROCK™RV ROOF COATING INSTRUCTIONS|Visit: FlexRockCoatings.com/resourcesBe Prepared to CoatYou will only have 30 to 40 minutes (See curing estimates chart) to apply your coatingmaterial (after Part A and Part B are mixed together) to the surfaces before thecoating material starts to harden.1.In order to begin coating, the substrate must be dry which is generally not achievablewithout having the dew point temperature being at least 5°C or 10°F below thesubstrate temperature. Application temperature should be 45°F and above.2.When you finish mixing the Part A and Part B, the pot life will be about a half hourtemperature and a 24 hour cure. 3.STORAGE AND MIXING LAYER
Safety glasses, gloves, and protective clothing must be worn at all times.FLEXROCK FX-100Natural Minerals, Plant-base Oils in the Part A mix will separate over time.1. Mix the FLEXROCK™ coating material Part A container well with a suitable mixersuch as those used with heavy duty hand drills for mixing small batches of masonry ormortar.2. Check to ensure that all minerals are mixed in. Mix until there are no lumps and thebottom of the container has been reached. Use the metal mixing blade and tap on theinside walls of the container including corners where the container bottom meets thecontainer sides to be sure. DO NOT THINRemember to Mix Part A Well.FLEXROCK™Mixing INSTRUCTIONS|Do not worry about over mixing of Part A. It is important not to have any mineralclumps in your mix due to incomplete mixing. This will affect your mix ratio.After completion of Part A mix, add entire Part B material from jug into the premixed Part A container.1.Mix Part A (white) with Part B (brown) until Part A and Part B are fully mixed together.2.Once Part A and Part B are fully mixed get the coating out of the bucket by pouringonto surface. Do not leave bucket standing upside down on the surface being coated.3.Mix Part-A separately forfor 3-5 minsShake Part-BAdd Part B to Part A Mixtogether for for 3-5 minsIMPORTANT: MIX THOROUGHLYFlexRockCoatings.com | 800.808.0414 | info@flexrockcoatings.com LAYER
Roll Roll MixMixFLEXROCK FX-100F X - 1 0 0 B A S EUse 1/2” to 1” nap rollers Use a short bristle brush/roller on smooth substrates.Use longer bristle brush/roller on rough substrates.(Care should be taken to back-roll immediatelybefore coating begins to setup) 30 minutes working timePoured-In -Place into work area and spreadwith notched squeegee, backroll immediately.HOW TO APPLY FLEXROCK STANDARD APPLICATION: For 5 minutes, mechanically mixall of part A, making sure to scrape the sides and bottom. Theproduct contains minerals that settle during storage, makingcordless drill mixers unsuitable. Double auger mixers or otherpowered concrete mixing drill is recommended. After pre-mixing part A, add full part B while mixing. Continue mixinguntil fully combined, 2-3 minutes. Set up your work area andensure that you can use all of the mixed products within 30-40 minutes. Pour in a ZIG ZAG Mix ThoroughlyPourPourBack Roll / Brush OnFlexRockCoatings.com | 800.808.0414 | info@flexrockcoatings.comSTRONG BY NATURE • HIGH PERFORMANCE RV ROOF COATING SYSTEM LAYER
Fills cracks before curing to get a deep penetrationand bonds to surface with outstanding adhesionOutstanding Adhesion and SuperDurability For Your RV Roof. FlexRock Coating is VOC-free,BPA-free, odorless, bleed blocking.Seamless and Waterproof3Triple Layer ProtectionDirect to Deck Application
PRO TIPFlexible Rock Coating is super versatile it can be applied extra thickfor added Roof Coating protection. By applying more material, yousimply add more protection and extend the lifespan even further. REINFORCEMENT SEAM TAPEMechanical ConnectionsVent PenetrationsFluid Applied Reinforced Roof SystemsReinforce Problem AreasBrush on problem areas and create aseamless incasement. Cover the areas that you want to add extraprotection to first. then coat the larger flatareas. SeamsGreat for metal seam repairsFlexRockCoatings.com | 800.808.0414 | info@flexrockcoatings.com
30 minutes working timeUse 1/2” nap rollers Use smooth or notched squeegee3Use a short bristle brush/roller on smooth substrates.PRO TIPBONDS AS IT FILLS CRACKSSTRONG BY NATURE • HIGH PERFORMANCE INDUSTRIAL COATING SYSTEMSeams and penetrations are the primary sources of leaks on RV roof systems. FlexRock Coatings™eliminates this vulnerability. Since the FlexRock Coatings™ mixture is applied as a liquid, it can fillgaps, seams, and cracks in the existing roof and substrate.CHEMICAL BONDFluid Applied Reinforced Roof SystemsPour a ZIG ZAG Care should be taken to back-roll immediately beforecoating begins to setup) Because the product constantlybonds to itself, a wet edge is not required.Always have a backup Poles, Rollers and BrushesBe well prepared with extra toolsBack Roll Back Back roll the material to evenly dispersed across theroof. The material will start to it here as soon as it comesin contact. Focus on spreading the material evenly. FlexRock Coatings will automatically self level.FlexRockCoatings.com | 800.808.0414 | info@flexrockcoatings.comF X - 1 0 0 B A S E LAYER*Do not apply FX-100 over a previously silicone coated roof
PEAL AND STICKAPPLY AND OVERLAPROLL AND APPLY PRESURERoof Surface PreparationFlex Seam Tape can be applied directly on replaced sheets ofplywood, known as "direct to deck" application. Werecommend using our Flex Seam Tape on the seams wherethe repair meets the rest of the roof in this situation.Our tapes are engineered with an adhesive thickness ofapproximately 27 mils and backed by 8 mils thickness.This additional thickness provides exceptional protectionto your RV.Clean Area ThoroughlyRemove the plastic backing without stretching thetape.1.Apply the tape to all seams at protrusions andperimeter, such as skylights and vents.2.Use pressure to activate the adhesive and avoidfish-mouths or wrinkles.3.Overlap pieces of tape by at least 1 inch.4.Fold the top sheet back down.5.Pull the release liner off the tape at a 45-degreeangle, parallel to the roof.6.With slight pressure, mate the surfaces together byswiping perpendicular to the seam to preventwrinkling.7.Roll the entire length of the seam with a two-inchsteel ruler, perpendicular to the seam's edge.8.Start at the eave and work towards the ridge.9.Always seal the vertical seams first.10.Center the membrane over the seam and start themembrane 1–1.5 inches above the start of thevertical seam.11.Use a roller to make sure the seam tape is bondedto the primer.12.Roll along the length and side to side so that theedges are bonded well.13.
SILICONE HIGH SOLIDFX-HS Silicone SealerSilicone High Solids Reflective, CRRC Rated No Solvents, Low Odor Single ComponentHigh SolidSiliconeS I L I C O N E T O P C O A T STRONG BY NATURE • HIGH PERFORMANCE RV ROOF COATING SYSTEM LAYEREase of Application - Extremely Fast and Simpleto Install• Economical - Extends The Life of Your Roof• Excellent Adhesion to a Variety of Roof Surfaces• Hydrophobic - Withstands Water Penetration• Prolongs The Life of a Roof While Helping LowerInternal Temperatures and Reducing Cooling Costs• Can Be Used To Reinforce and Seal Seams,Penetrations and Terminations, and Make SpotRepairs• Slows Degradation Caused By Normal Weathering,Aging, and Ultraviolet Rays
Over existing membraneApplying FX-Silicone Basecoat LayerYou have reached the highlight of theprocess! After sealing all penetrations andcutting in the roof around fixtures, it's time toapply the base layer to the main body of theroof. This step is particularly gratifying asyou witness the full application taking shape.Prior to rolling out the base layer, it is advisable to use a leaf blower to eliminate any dry particlesthat may have been brought onto the roof. This ensures that unwanted debris is cleared before thebase layer is applied.Start by preparing a roller frame and a ½” nap roller attached to an extensionpole. Have an open container of FlexRock Silicone base layer and the roller onan extension pole ready for the following steps.It's recommended to wear shoe covers or socks without shoes while applyingthe base layer! This will help maintain a clean roof surface during application.Begin at the part of the roof farthest from where you will exit! Since mostpeople access the roof from the rear, you will usually start applying from thefront.Shoe Covers or Socks
Over existing membraneSUBMERGE ROLLER HEAVY THICK COATSubmerge the roller head completely in the pail or bucket with thebase layer and generously apply it to the roof surface. Expect tocollect a large amount of product on the surface, allowing it todrip as you roll it onto the roof. Once the roller head is on the roof,smoothly move it forward and backward from its initial placement.Ensure that you apply and remove the product evenly with eachstroke.Focus on a gliding motion rather than a rolling one. Strive for a"quiet" roller head to avoid the typical sticky sound of paintapplication. This technique enables you to apply the product in athick, smooth layer. Keep the roller wet throughout the process.Quickly address any runs or drips on the roof to prevent themfrom drying and becoming an issue.Applying FX-Silicone Basecoat LayerAppy Thick, Heavy Coat
PRO TIPEasy Apply Roll OnApplying FX-Silicone Basecoat LayerThe movement you should aim for here is more of a gliding motion rather than rolling. Werecommend using a roller head that operates quietly. This means you won't hear the usualsticky sound, similar to painting a wall. This technique allows you to smoothly apply theproduct in a thick layer. It's crucial to keep the roller moist during the entire process.Remember to promptly smooth out any runs or drips on the surface to prevent them fromdrying. Smooth Gliding MotionGlide the product like a squeegeePush Forward Then Back RollOver existing membrane
Over existing membraneApply product across the roof surface, finishing near the ladder. Detach roller frame,dip into FlexRock Silicone, roll final section, then descend holding the roller.1. Begin by applying the product across the entire surface of the roof, ensuringeven coverage.2. As you near the ladder where you will descend from the roof, focus on the final4 to 5 square feet of the roof.3. Detach the roller frame from the extension pole when you reach thedesignated area next to the ladder.4. Dip the roller into the FlexRock Silicone base coat once more.6. Bring the remaining product down from the roof, ensuring it's safely stored.7. Return to the roof after safely descending and manually roll the last section ofthe roof.8. Safely descend from the ladder while holding the empty roller, ensuring asecure grip throughout the process.Applying FX-Silicone Basecoat LayerStart in the Front end in Back Close to the Finish Line
PolyrubexImpact ResistantSilentShield - Sound Dampening EXCESS IS REMOVED READY FOR TOP COAT Infused BinderLayerSTRONG BY NATURE • HIGH PERFORMANCE RV ROOF COATING SYSTEM LAYERP O L Y R U B E XUltimate solution with exceptionalwaterproofing and sound dampening.Protects surfaces from water damage,absorbs sound waves for a tranquilenvironment. Redefine peace, comfort, andprotection with SilentShield.The rugged composition of FlexRock RoofArmor makes it highly resistant to impacts,protecting your roof from hail, falling debris,and other potential hazards.
PRO TIPPolyrubexImpact ResistantSilentShield - Sound Dampening 2While the FX-100 is wet, the PolyRubex is broadcast(throw in the air on to wet roof) evenly distribute. Donot worry about putting on too much. This will besealed in with the FX-Silicone topcoat application. EXCESS IS REMOVED READY FOR TOP COAT WaterproofEasy Paint OnRV-Roof Armor UV ResistantSound Dampening Unleash Your RV's Ultimate Protection!Impact ResistantTriple Layer ProjectionLayerPolyRubexBinderPolyRubex BinderInfused BinderLayerHow to Apply PolyRubexPour and Back Roll30 minutes working time30 minutes working time24 hours later Apply FX-Silicone TopCoatApplying PolyRubex1Apply FX-100 as a base coat. Pourand roll evenly, be sure to fill in anycracks or imperfections in the floorand have a smooth you even surface.34After 24 hours and the base coat hasdried. Remove any loose aggregateby sweeping or vacuuming. Remove Excess AggregateYou may choose to put one or two coats of FX-Siliconesealer One coat will produce a floor with more texture,which gives a nonskid grip to the floor. Two coats producesa smoother, with less slip resistance glossier floor wherelittle to no PolyRubex is visible.STRONG BY NATURE • HIGH PERFORMANCE RV ROOF COATING SYSTEMP O L Y R U B E X LAYERDirect to Deck Application
Over existing membraneMixing in PolyRubexWaterproofEasy Paint OnRV-Roof Armor UV ResistantSound Dampening Unleash Your RV's Ultimate Protection!Impact ResistantTriple Layer ProjectionLayerPolyRubexBinderPolyRubex BinderPolyrubexApplying The PolyRubexBroadcastThe process involves sprinklingPolyRubex on to the wet roofcoating.Mixing in PolyRubex into theSilicone TopCoat. Experience advantage of PolyRubex application with twostraightforward methods. The first, "Broadcasting," involves simplysprinkling the material onto the wet base coat, creating a cushionedlayer. This layer can then be coated smoothly with a single application orfurther enhanced by adding a second coat with PolyRubex mixed intothe silicone topcoat. With these techniques, enjoy enhanced sounddampening and insulation for your roof, effortlessly elevating itsprotection.Infused BinderTo smooth out and add seal in thePolyRubex add a Final Coat of FX-HSSiliconeOR
Over existing membraneBroadcasting PolyRubex into Wet Silicone Roof:1. Prepare the PolyRubex: - Place the PolyRubex material into a bucket or container. Ensure the PolyRubex is clean, dry,and free of any debris or contaminants.2 Consider Having Assistance: - For ease and safety, it may be helpful to have two people broadcasting onto the roof. In thiscase, one person can remain on the ground to support and hand materials to the person on theroof.3. Set Up Ladder Safely: - If using a ladder, ensure it is set up securely on a stable surface, such as the side of the RV. - Follow ladder safety guidelines and have one person hold the ladder steady while the otherclimbs.Applying The PolyRubexHow to Broadcast PolyRubexThe process involves sprinklingPolyRubex on to the wet roof coating.5. Cleanup Preparation: - Consider using a tarp or drop cloth on the sides of the RV to catch any excess PolyRubex andfacilitate cleanup later. EXCESS IS REMOVED READY FOR TOP COAT
Over existing membraneWaterproofEasy Paint OnRV-Roof Armor UV ResistantSound Dampening Unleash Your RV's Ultimate Protection!Impact ResistantTriple Layer ProjectionLayerPolyRubexBinderPolyRubex BinderApplying The PolyRubexr Start Broadcasting: - Take a handful of PolyRubex from the bucket. - Begin at the furthest corner from the exit or entrance point of the roof to avoid walking over the freshlybroadcasted PolyRubex.Even Distribution: - Using a sweeping motion, sprinkle the PolyRubex evenly across the wet silicone surface. - Aim to achieve a full broadcast, covering the entire surface area without leaving any bare spots.Overlap for Consistency: - Overlap each pass slightly to ensure consistent coverage and avoid gaps or thin areas. - Be mindful of corners and edges, ensuring they receive an adequate amount of PolyRubex. Work in Sections: - Divide the roof into manageable sections to ensure thorough coverage. - Continue broadcasting the PolyRubex section by section until the entire roof is covered.Inspect for Uniformity: - Periodically stop and visually inspect the surface to ensure the PolyRubex is evenly distributed. - Adjust your broadcasting technique if needed to achieve uniform coverage.Repeat if Necessary: - If the first pass does not provide adequate coverage, apply additional PolyRubex as needed to achieve thedesired thickness and texture. Complete the Broadcast: - Continue broadcasting PolyRubex until the entire surface is covered uniformly and to the desired thickness. - Ensure that all excess PolyRubex is removed from the edges and corners of the roof.Allow Cure Time: - Once the PolyRubex is fully broadcasted, allow the silicone to cure according to the manufacturer'sinstructions before proceeding with any additional steps.How to Broadcast PolyRubex
Over existing membraneWaterproofEasy Paint OnRV-Roof Armor UV ResistantSound Dampening Unleash Your RV's Ultimate Protection!Impact ResistantTriple Layer ProjectionLayerPolyRubexBinderPolyRubex BinderApplying The PolyRubexrEasy Apply Roll OnDO NOT EXCEED 1.5 GALLONS PER 100 SF PER APPLICATION for FX-HS.This could cause blisters and/or pinholes. Care should be taken to avoidsagging, pinholes, and runs of the coating on vertical, horizontal, and slantedsurfaces to prevent sagging. Application rate may need adjusting if coatingstarts to sag on verticals or higher slopes. Allow base coat and/ or top coatto dry 24 hours between coats. Additional coats may be required to achieverequired mil thickness. FX- Accelerator may be added to speed cure time incool or dry conditions. Recoat time for HS depends on environmentalconditions and cleanliness of substrate. If applying after 48 hours, anadhesion test is recommended Allow base coat and/ or top coatto dry 24 hours between coats.Apply Apply second Coat/FinalCoat within 48 hrsTake Care Not Drag Or Scape Roof During theInstallation Process. Silicone will take up to seven daysfor a full cure. Tread lightly on your new roof during thistime.
Over existing membraneWaterproofEasy Paint OnRV-Roof Armor UV ResistantSound Dampening Unleash Your RV's Ultimate Protection!Impact ResistantTriple Layer ProjectionLayerPolyRubexBinderPolyRubex BinderBy Volume: 5 Parts Silicone Top Coat to 1 Part PolyRubexPRO TIPTOSS POLYRUBEX FROM SIDES TOSS POLYRUBEX FROM BACK MIX IN POLYRUBEX TO TOP COAT ONLY DO NOT MIX IN TO THE BASE COATApplying The PolyRubexrMixing in PolyRubex into theSilicone TopCoat. Mixing in PolyRubexInfused BinderEasy Apply Roll OnMix Ratio:By Weight: 10 lbs Silicone to 2 lbs PolyRubexAdd PolyRubex to the Silicone and MixSlowly so you do not add air to the silicone
PRO TIPBrushes andRoller Coversare One TimeUse!Have plenty on hand!Application ToolsAPPLICATION TOOLS
TarpApplication Tools andMaterialsEMPTYCONTAINERSAPPLICATION TOOLSBrushes and Roller Coversare One Time Use!FlexRockCoatings.comLADDERBUCKETSROLLERFRAMECLEANUP RAGS1/2” NAPROLLERSDISPOSABLEGLOVESSCRUBBRUSHSCRAPERBLADELEAF BLOWERCAULK GUN3” BRUSHESELECTRICDRILLPRESSURE WASHER EXTENSION POLEPaint Extension PoleMasking TapeUtility KnifeTailoring Your Toolkit to Match Your Project NeedsEach project is different, so the required tools may vary from one toanother. While some items are essential, the quantity required maydiffer based on the project. This section aims to inform you ofessential items and suggest additional tools that can make the projecteasier.
OTHER CONSIDERATIONSA FlexRock Coating should not be considered for:1. Surfaces prone to pedestrian traffic, decks, and frequent trafficbearing. Unless using a topcoat such as a polyaspartic.2. Surfaces that are not prepared, including but not limited to wet,dusty, oily, mildewed, heavily chalked, blistered, or otherwisestructurally unsound surfaces.3. Oil-bleeding and solvent-bleeding materials. The list includes,but is not limited to, some vulcanized rubber products, tapes, failedsealants, some caulking compounds and asphaltic/mastic materialswithout appropriate preparation.4. Surfaces where adhesion has not been verified by testing.5. New EPDM may need a primer or surface prep.6. Any type of roof shinglesIMPORTANT: FlexRock Coatings can only ensure product performance if the applicators strictly adhere to thisspecification.FlexRock Coatings Management must approve any changes to specifications in writing.5. DO NOT THIN6. Keep away from food. If rain is expected within an hour of applying the product at temperaturesbelow 35°F (2°C), don’t apply it. Be sure to secure the pail and tighten the lid when transporting. Storein a cool, dry, shaded location. Ensure lid is completely sealed.ROOF COATING APPLICATIONPULL-TESTING (BEFORE APPLICATION): For best results, conduct a pull test polyester high-performance reinforcement fabric to test the surface and to ensure no contaminants are present beforeapplication.FlexRockCoatings.com | 800.808.0414 | info@flexrockcoatings.comFor larger projects we highly recommend purchasing a dual auger mixer. Not all roofs are candidates for refurbishing. Use Extreme Caution when doing anyroof repair always use safety equipment. When in doubt consult a professionalroofing contractorDISCLAIMER: THE INFORMATION HERE IN IS BASED ON THE DATA AVAILABLE AND IS BELIEVED TO BE ACCURATE, HOWEVER, THE MANUFACTURER MAKES NO WARRANTY EXPRESSED OR IMPLIED REGARDING THE ACCURACY OF THIS DATA OR THE RESULTS OBTAINED FROM THEUSE THEREOF. ACCORDINGLY, WE ASSUME NO RESPONSIBILITY FOR INJURY FROM THE USEOF THIS PRODUCT.
STORAGE AND STABILITYSTORAGE, FX-100:To prevent freezing, store products in a cool, dry area.Ensure Part-B remains moisture-free and keep the containersealed. Leaving Part-B open may cause moisture absorption andresult in CO2 gas buildup, leading to pressure increase.Consider storing Part-A pails upside down 24 hours beforemixing.SHELF LIFE:It is advisable to use all products within a year.If stored for over 6 months, shaking can help release settledminerals.FlexRockCoatings.com | 800.808.0414 | info@flexrockcoatings.comFlexRock Silicone Keep containers closed, store in a dry, cool placeelevated and away from heat, sparks, open flame, and moisture. FX-HS has a maximum shelf life of one year when stored attemperatures between 32°F and 100°F (0°C to 38°C). Cautionshould be exercised to prevent material from freezing.STORAGE: FLEXROCK SILICONE
How To VideosHow To VideosHow To VideosGET COATEDSTRONG BY NATURE • HIGH PERFORMANCE INDUSTRIAL COATING SYSTEMOur factory-direct program is straightforward and designed to save you money Online Training and ResourcesBuy Online at FLEXROCKCOATINGS.comOnline How to VideosInstaller Network Choose Full Service Installationfrom Contractors In Your AreaSave Money and DIY We have a Online Video Training andResource for your crews, or a highlyskilled network of Professionals for youto choose from.Visit: flexrockcoatings.com/resourcesFlexRockCoatings.com | 800.808.0414 | info@flexrockcoatings.com
INSTALLERNETWORKN E E D A N I N S T A L L E R ?Our factory-direct program is straightforward and designed to save you money STRONG BY NATUREZero VOCsECO FRIENDLYECO FRIENDLYChoose Full Service Applicationfrom Contractors In Your AreaWe have an online video training and resource for your crews, or ahighly skilled network of professionals for you to choose from.FlexRockCoatings.com | 800.808.0414 | info@flexrockcoatings.comNew Leads for Your BusinessNo Franchise FeesSpecial Discount on Volume OrdersFast Shipping No Inventory RequirementsJoin Our Installer Network